Friday, February 26, 2010

Onion Rings


So you know when you bite into something really delicious and you just kind of sit there for a second with it in you mouth and think about how life doesn't get much better? And your tastebuds are in overdrive and you are just using every sensation you have in your mouth to drain every bit of goodness from said delicious thing?

Yah, these guys will make that happen. Trust me. Or don't trust me, go make them. Then you will see that I never lie.

In the wake of yet ANOTHER snowstorm here in New York (which I must say I'm still all atwitter about but I swear I can hear the rest of the city mumbling curse words under their breath), I decided some fried deliciousness was in order. Since I mde doughnuts on the last snow day, I thought I should keep with the theme.  And I remembered some over the top amazing looking onion rings over at The Brown Eyed Baker, and new I was destined for a delicious dinner.

These are so easy to make and I am just so impressed with myself for making them and prolonging my frequent visit to Outback Steakhouse for their bloomin' onion appetizer (yes, I usually eat the whole thing). The dipping sauce is perfectly tangy to complement the fried love, or at least that's what I'm calling these.


Onion Rings with Dipping Sauce from The Brown Eyed Baker

  • 2 medium sweet onions

  • 1/4 cup all-purpose flour

  • 1/2 teaspoon salt

  • 1/4 teaspoon ground black pepper

  • 1/4 teaspoon cayenne pepper

  • 1/2 cup buttermilk

  • 1 egg

  • 1/4 cup plus 1 tablespoon all-purpose flour

  • 1 1/2 cups crushed potato chips

  • 3 tablespoons vegetable oil


Preheat oven to 450 degrees F.

Combine ¼ cup flour, salt, black pepper and cayenne in a bowl.

In another bowl combine the buttermilk, egg and additional flour, whisking until a smooth batter is formed.

In a third bowl, place the crushed potato chips.

Prepare the onion rings by first dipping a ring into the seasoned flour, then into the batter (let the excess batter drip off), and then coat with the crushed potato chips. As you finish the rings, place them on a large plate. Repeat with all rings.

Cover a baking sheet with a piece of parchment paper. Drizzle the vegetable oil on the parchment-lined sheet and place in the oven for 8 minutes. Carefully remove the sheet from the oven and tilt to evenly coat with oil.

Working quickly, place your onion rings on the baking sheet and return to oven. Bake for 8 minutes, then flip onion rings and bake for an additional 6-8 minutes, or until golden brown.

Dipping Sauce

  • 1/2 cup mayonnaise

  • 2 teaspoons ketchup

  • 2 tablespoons horseradish

  • 1/4 tablespoons paprika

  • 1/4 teaspoon salt

  • 1/8 teaspoon garlic powder

  • 1/8 teaspoon dried oregano

  • Dash ground black pepper

  • Dash cayenne pepper


Combine all ingredients and refrigerate.

Thursday, February 25, 2010

Coffee Ice Cream


EVERYONE and their mother has been talking about coffee ice cream lately. This is entirely unfair. Allow me to explain:

I am addicted to coffee. Nevermind that I love the stuff. But I literally CANNOT leave the house in the morning without a cup of coffee already in my belly. This means that even if I am meeting someone for coffee before work, if I am getting picked up to go skiing at 5am or even if I am going to board a 6 hour plane flight home where I should just be sleeping the entire time. To emphasize my point, I have an obsession. 

So I was happily enjoying my winter here in New York. You know, watching the snow fall, laughing at the suckers who have to shovel it, eating my warm cookies. And then, BAM! Everyone is telling me how much they love coffee ice cream! I immediately started salivating, sweating and acting like the world was falling down. I knew what the problem was: I NEEDED coffee ice cream!

La de da da da...I skipped home with my milk and instant coffee in my grocery sack, knowing what lay in store for me back at the apartment. 30 minutes later I was happy once again, but only after devouring an entire recipe of coffee ice cream. The world is a better place now. Thank you for tuning in. =)

Coffee Chip Ice Cream Adapted from Ben and Jerry's

  • 2 eggs

  • 2 cup half and half

  • 1 cup whole milk

  • 3/4 cup sugar

  • 3 tablespoons instant decaf coffee

  • 1 bag mini chocolate chips


Whisk the eggs until fluffy. Add the half and half, milk and sugar and whisk. Add the decaf coffee and whisk until combined. Freeze according to manufacturer's instructions. During last 10 minutes, add the chocolate chips.

Wednesday, February 24, 2010

Vegetable Minestrone

Tah dah! I bring you real food!

Although we ALL know sugar is waaaaay more fun!

At least it is for me. But sometimes I need to take the measuring cup out of the sugar bag, stick the butter back in the fridge and cut up some veggies.

I found this recipe on What a Dish's site, and knew immediately it was going to be my dinner for the week. I made a huge batch of it on Sunday and let it simmer on the stove for most of the afternoon. It was perfect and I have been enjoying it thoroughly all week. I think I may turn into a Minestrone.

Whatever that is...

I left out the pasta this time around, just for kicks.

Vegetable Minestrone adapted from What a Dish!

3 tablespoons olive oil
3 cloves garlic, chopped
1 large onion, chopped
2 cups chopped celery
3 carrots, sliced
2 cups veggie broth
2 cups water
4 cups tomato sauce
1 (15 ounce) can kidney beans, drained
1 cup fresh green beans, rinsed and chopped into 1-inch pieces
2 cups baby spinach, rinsed
2 zucchinis, quartered and sliced
1 tablespoon chopped fresh oregano, or 1/2 teaspoon dried
2 tablespoons chopped fresh basil, or 1 teaspoon dried
salt and pepper to taste

In a large stock pot, over medium-low heat, heat olive oil and saute garlic for 2 to 3 minutes. Add onion and saute for 4 to 5 minutes. Add celery and carrots, saute for 1 to 2 minutes.

Add veggie broth, water and tomato sauce, bring to boil, stirring frequently.  Reduce heat to low and add kidney beans, green beans, spinach leaves, zucchini, oregano, basil, salt and pepper. Simmer for 30 to 40 minutes, the longer the better.  (If the liquid level goes down too much, you may need to add extra broth or water).

Tuesday, February 23, 2010

Double Chocolate Brownies


Martha Stewart failed me this weekend.

I didn't think I would ever say that. Martha has always been my baking constant.

But don't worry, there's a happy ending!

I am voraciously making my way through her Cookie book and this weekend I decided on these Pistachio Lemon Drop Cookies. The first time I started laughing was when the mixer wouldn't mix just one egg white. Then I started doing it myself with a whisk and it wasn't so funny anymore. Then I ended up with about 1 cup of "cookie dough", which translated into 8 cookies. And by the time I took them out of the oven, they had completely flattened into eachother and were rocks on my cookie sheet. I burst out laughing and decided to go to the gym.

Immediately upon my return, I decided brownies would more than make up for the epic failure of the morning. And boy, did they restore my faith in Martha! These brownies are super duper fudgy and have a shiny, crumbly crust on the top.

Double Chocolate Brownies from Martha Sewart's Cookie Book
  • 6 tablespoons unsalted butter, plus more for pan

  • 6 ounces coarsely chopped good-quality semisweet chocolate

  • 1/4 cup unsweetened cocoa powder (not Dutch-process)

  • 3/4 cup all-purpose flour

  • 1/4 teaspoon baking powder

  • 1/4 teaspoon salt

  • 1 cup sugar

  • 2 large eggs

  • 2 teaspoons pure vanilla extract

  • Preheat oven to 350 degrees. Line a buttered 8-inch square baking pan with foil or parchment paper, allowing 2 inches to hang over sides. Butter lining (excluding overhang); set pan aside.

    Put butter, chocolate, and cocoa in a heatproof medium bowl set over a pan of simmering water; stir until butter and chocolate are melted. Let cool slightly.

    Whisk together flour, baking powder, and salt in a separate bowl; set aside.

    Put sugar, eggs, and vanilla in the bowl of an electric mixer fitted with the whisk attachment, and beat on medium speed until pale, about 4 minutes. Add chocolate mixture; beat until combined. Add flour mixture; beat, scraping down sides of bowl, until well incorporated.

    Pour batter into prepared pan; smooth top with a rubber spatula. Bake until a cake tester inserted into brownies (avoid center and edges) comes out with a few crumbs but is not wet, about 35 minutes. Let cool slightly in pan, about 15 minutes. Lift out brownies; let cool completely on a wire rack before cutting into squares.

    Monday, February 22, 2010

    Chocolate Mint Cookies


    Chocolate mint would be perfection.

    Did you ever see that episode of Friends where Chandler is stuck in an ATM vestibule with Jill Goodacre? She asks if he would like some gum and after thinking about it, Chandler responds "Gum would be perfection".

    Bwahaha! What a goober! And if you didn't watch Friends come find me because I got all ten seasons for Christmas and will do pretty much anything to have people watch that show with me (as long as you don't mind me quoting every line).

    Anywhoo, I love the combo of mint and chocolate. Mint chocolate chip IS my favorite flavor of ice cream, after all. But this time its cookies. And delicious cookies, mind you. Spice doesn't like mint and chocolate together so I got the fortunate (unfortunate) pleasure of eating all of these. My midsection thanks her.

    These are a great cookie. Very chocolatey and chewy, but slightly crunchy. And the mint on top is divoon. Good day.

    Chocolate Mint Cookies from All Recipes
  • 3/4 cup butter

  • 1 1/2 cups packed brown sugar

  • 2 tablespoons water

  • 2 cups semisweet chocolate chips

  • 2 eggs

  • 2 1/2 cups all-purpose flour

  • 1 1/4 teaspoons baking soda

  • 1/2 teaspoon salt

  • 36 chocolate mint wafer candies (like Andes)

  • In a large pan over low heat, cook butter, sugar and water until butter is melted. Add chocolate chips and stir until partially melted. Remove from heat and continue to stir until chocolate is completely melted. Pour into a large bowl and let stand 10 minutes to cool off slightly.

    At high speed, beat in eggs, one at a time into chocolate mixture. Reduce speed to low and add dry ingredients, beating until blended. Chill dough about 1 hour.

    Preheat oven to 350 degrees F (175 degrees C). Roll dough into balls and place on ungreased cookie sheet about 2 inches apart. Bake 8-10 minutes. While cookies are baking unwrap mints and divide each in half. When cookies are brought out of the oven, put 1/2 mint on top of each cookie. Let the mint sit for up to 5 minutes until melted, then spread the mint on top of the cookie.

    Friday, February 19, 2010

    I've Moved!

    Please visit me at my new blog:

    http://everythingnicebysugarandspice.com/

    Mocha Cupcakes


    Bananie informed me that she had to bring treats to class last weekend. Yes, she is in graduate school and not 5th grade and yes, they apparently still have snack time.

    I decided this was the perfect opportunity to make one of my favorite flavors: coffee!! In cupcake form! My reasoning is that I wouldn't have to have it in the house and could send the cupcakes on their merry little way to class with Bananie.

    The cupcakes met their doom, however. I packed these lovely little dudes in our handy cupcake carrier and set them out for Bananie to take with her.

    Unfortunately, the cupcakes ended up in the bottom of a large bag and by the time Bananie had trecked the 10 blocks to the subway station, they were apparently in tatters. This post is full of unfortune because Bananie didn't save the cupcakes for us. (Mind you, Spice and I would have hovered over the smushed cupcakes with a fork.) She...THREW THEM AWAY! Nope, not sad at all over here.

    Nonetheless, the cupcakes were great! With a big coffee flavor. I used Martha's seven minute frosting, basically meringue, which I had never used before. I think I prefer cream cheese frosting or buttercream, but it was great to experiment with a different recipe!

    Mocha Cupcakes from Martha Stewart's Cupcake Book

    For the cupcakes:
    2 1/4 cups cake flour (not self-rising), sifted
    2 tablespoons unsweetened Dutch-process cocoa powder
    1/2 cup unsalted butter, room temperature
    1 1/2 cups packed light-brown sugar
    2 large eggs, room temperature
    1 teaspoon pure vanilla extract
    1 1/2 teaspoons baking soda
    1/4 teaspoon salt
    1/2 cup sour cream, room temperature
    3/4 cup freshly brewed espresso
    1 tablespoon instant espresso powder (not instant coffee)

    For the frosting:
    1 1/2 cups plus 2 tablespoons sugar
    2/3 cup water
    2 tablespoons light corn syrup
    6 large egg whites, room temperature
    2 tablespoons pure coffee extract

    Make the Cupcakes:

    Preheat oven to 325°F (160°C). Line standard muffin tins with paper liners.

    Whisk together cake flour and cocoa. With an electric mixer on medium-high speed, cream butter until smooth and light. Add the brown sugar and eggs; beat until fluffy, scraping down sides of bowl as needed. Add the vanilla, baking soda, and salt; beat to combine thoroughly.

    Reduce speed to low. Add flour mixture in three batches, alternating with two additions of sour cream, and beating until just combined after each. Mix together brewed espresso and espresso powder; add to batter, and beat until smooth.

    Divide batter evenly among lined cups, filling each three-quarters full. Bake, rotating tins halfway through, until a cake tester inserted in centers comes out with only a few moist crumbs attached, about 22 minutes. Transfer tins to wire racks to cool completely be¬fore removing cupcakes.

    Make the Frosting:

    Combine 1 1/2 cups sugar with the water and corn syrup in a small saucepan; clip a candy thermometer to side of pan. Bring to a boil over medium heat, stirring occasionally, until sugar dissolves. Continue boiling, without stirring, until syrup reaches 230°F (110°C).

    Meanwhile, in the bowl of a standing electric mixer fitted with the whisk attachment, whisk egg whites on medium-high speed until soft peaks form. With mixer running, add remaining 2 tablespoons sugar, beating to combine.

    As soon as sugar syrup reaches 230°F (110°C), remove from the heat. With mixer on medium-low speed, pour syrup down side of bowl in a slow, steady stream. Raise speed to medium-high; whisk until mixture is completely cool (test by touching the bottom of the bowl) and stiff (but not dry) peaks form, about 7 minutes. Add 2 tablespoons coffee extract, whisking to combine. Use immediately.

    Thursday, February 18, 2010

    New York, New York

    BagelsStill Warm from the Oven


    Warm and Delicious


    Crispy Outside Warm Middle


    Get in my Belly!


    I hope you all enjoyed my haiku, poetry has never been my strong point. But there really isn't a better way to describe my love for all that is Bagel. Having grown up in New York (upstate still counts people!) I like to consider myself a connoisseur of all things bagel. I love them in every flavor, with every topping, at any time of the day. So when I got to Bagels in BBA I couldn't wait to try them out! I made plain, poppy seed, and get this... Chocolate Chip (at Sugar's request of course).  These do take some time, but I tell you they are worth every second.  So grab the baking soda kids, its time to make yummies...


    Bagels


    Sponge:


    1 tsp instant yeast


    18 ounces unbleached bread flour


    20 ounces water at room temp


    Dough:


    1/2 tsp instant yeast


    17 ounces unbleached bread flour


    2 ¾ tsp salt


    1 tbsp honey


    Finishers:


    1 tbsp baking soda


    cornmeal


    Day 1: Make sponge; stir yeast and flour in your mixer bowl. Add water and stir until smooth and sticky. Cover with plastic wrap and leave at room temp for 2 hours, it should be very foamy and slightly bigger once done.


    In the same bowl add the additional yeast and stir. Add 3 cups of flour, the salt, and honey. Stir on low speed with dough hook until a ball forms, slowly work in the rest (3/4 cup) of flour to stiffen the dough


    Mix on medium for 6 minutes until dough is firm but still pliable and smooth, not tacky.


    Divide dough into 4.5 ounce balls. Cover with damp towel and let rest for 20 minutes


    Line 2 sheet pans with parchment and mist with spray.


    To shape take each ball and poke your thumb through the center. Gently stretch dough, by rotating your thumb to widen the hole to about 2.5 inchs in diamiter. Place the shaped pieces on the pans, l mist with spray, cover with plastic wrap and let sit for 20 minutes. After this time place in fridge overnight.


    Day 2: Preheat over to 500 depgrees with two racks set in the middle. Bring a large pot of water to boil, and then add baking soda have your slotted spoon nearby.


    Remove bagels from fridge and drop 2 or 3 (dpending on the size of your pan) into the boiling water (they should float within 10 seconds). After 2 minutes flip bagels and boil for an additional 2 minutes on the other side. While the bagels are boils sprinkle your parchment with cornmeal, use a good amount these bad boys love to stick. Remove bagels from water and place on the sheet (this would be the time to top if you want to ).


    Once all bagels are boiled place pans in the oven and bake for 7 minutes, then rotate pans 180 degrees and switch racks. After rotation lower oven to 450 and continue baking for 7 to 10 minutes until golden brown.


    Let bagels cool for 15 minutes and serve


    Tuesday, February 16, 2010

    Ganache Covered Red Velvet Hearts

    This is what I made for Valentine's Day for my friend Kali and I. We had an enjoyable evening on the couch watching Dr. Quinn Medicine Woman. I can hear you laughing at us. Stop now. Or I wont show you the delicious dessert I made. And it's a doozy. It kind of blew my mind.

    Ok, I don't care if you're laughing, I just have to show you this!


    So first I made red velvet cake. Actually I made red velvet brownies, but if I do this again I will use cake. This is a good recipe. Bake it in a 9 by 13 inch baking dish. When cooled completely, invert cake onto a cutting board and, using a heart shaped cookie cutter, cut hearts out of the cake.

    Cut each heart in half and spread a heapingly large amount of cream cheese frosting in it. This is the recipe I used and its pretty delicious if I do say so myself.

    Next, make a chocolate ganache glaze. Continuing with my Martha theme, I used Martha's ganache glaze. Pour it over the red velvet hearts (which I suggest placing on a parchment-lined baking sheet), and make sure it covers all of the cake. Let the ganache harden a bit before sprinkling with red sanding sugar.


    Next step: devour. We sure didn't have a problem in this area. Thank heavens!

    Friday, February 12, 2010

    Valentine's Day Sugar Cookies

    Well I'll be a monkey's uncle, Valentine's Day is Sunday!

    I made these cookies and shipped them out with my fingers crossed that they would make the journey across the country safe and sound. Just a little shout out to the parentals thanking them for loving me and for all they do to support me =)

    Here are some things that I love, in case I forget:

    My parental units
    My friends
    Snow
    Thunder
    Storms
    Fireplaces
    Sweatpants
    Baking
    Cookies
    Frozen yogurt
    Down comforters
    Friends on DVD
    Margaritas
    Nacho night
    Dancing
    Ballet
    My stepmom's pizza
    Jilly, my puppy dog
    Running
    Dinner time
    Spider solitaire
    Being silly
    Sore muscles
    Dark nail polish
    The train that goes straight from Queens to Brooklyn (oh, wait! It doesn't exist! You MTA douchbags...)
    Blogging
    Swimming
    Red wine
    Christmastime
    Fuzzy boots

    That's all I got for now! Happy Valentine's Day on Sunday!

    Thursday, February 11, 2010

    Doughnuts and a Blizzard

    Woo hoo hoo hoo! Did we get some snow yesterday or what?! It looked to me like it ended up being about 12 inches in Queens. And everyone on my way to work this morning was shoveling. Suckers!


    I, luckily, don't have to shovel because I don't own my apartment. That's why I get to call the shovelers "suckers". Also, just because I'm nice!

    I trecked my way into work yesterday for a full hour before they closed our office. Que suerte!
    I got the chance to get out to the park by my apartment and take some pictures. There were some people out tubing, sledding and building snowmen.


    My favorite though, was the people who were out for a run.

    Let me repeat myself: OUT. FOR. A. RUN. IN A BLIZZARD! Are you nuts?? I wanted to slap them and shove a doughnut down their throats.

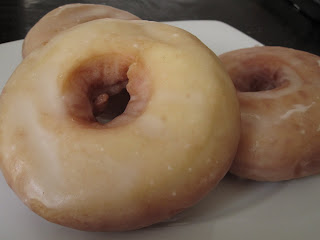
    Anyways, after I trudged myself home from work, I found it to be an excellent opportunity to make doughnuts. That pesky Pioneer Woman put it into my head earlier this week. It's not my fault.

    I definitely can't explain the doughnuts any better than she can, so you can go there to see the step by step tutorial she put together. What a kewl gal.

    But before you click over, emmerse yourself in the deliciousness:


    And oh boy oh boy! Were these dudes delicious! I was pretty proud of my success, but I didn't even realize how proud I was allowed to be until these disappeared a full .2 seconds after I set them out at work. Such a fun project for a snow day!

    Wednesday, February 10, 2010

    Peanut Butter, Chocolate Chip and Cinnamon Cookies

    It's pretty hard to write this with the blizzard taking place outside my window right now. Literally. We are supposed to get up to 18 inches of snow! I've never seen that much in my life! More on that tomorrow...

    Today: Cookies! (typical)

    These are good peanut butter cookies, especially the day off. They are crisp on the outside and wonderfully chewy on the inside. I think the consistency of these cookies were perfect. Next time I may up the peanut butter content, because, lets face it: I'm a peanut butter lover. The cinnamon is definitely apparent and it such an interesting spice to find in peanut butter cookies. I really liked it though!


    Peanut Butter, Chocolate Chip and Cinnamon Cookies
    Adapted from Martha Stewart's Cookie Book

    2 cups all-purpose flour
    1 teaspoon baking soda
    1 teaspoon salt
    1/2 teaspoon ground cinnamon
    3/4 cup unsalted butter, room temperature
    1/2 cup smooth peanut butter
    1 cup packed light brown sugar
    1/2 cup granulated sugar
    2 large eggs
    1 1/2 cups mini semi-sweet chocolate chips
    2 teaspoons vanilla extract

    Preheat oven to 350 degrees F. Whisk together flour, baking soda, salt and cinnamon in a bowl.

    Put the butter and peanut butter in the bowl of an electric mixer fitted with the paddle attachment; mix on medium speed until combined, about 2 minutes. Add sugars; mix 2 minutes. Mix in eggs. Gradually add flour mixture; mix until just combined. Fold in chocolate chips and vanilla until well distributed. Refrigerate dough until slightly firm, 15 minutes. 

    Roll dough into 1-inch balls. Space balls 2 to 3 inches apart on baking sheets. Flatten slightly. Bake until golden, about 13 minutes. Transfer cookies to wire racks to cool. 

    Tuesday, February 9, 2010

    Mighty Kate CD Release


    No sweets for today. Actually I have some but I am withholding because I have the power. Mwhahahah!

    Just kidding. Actually, my awesome voice teacher, Katy Pfaffl, had a CD release show last night for her new album "Mighty Kate".

    A little background on Katy: she basically taught herself how to sing and how to play the guitar, piano and violin. AND how to do several at the same time. It's nuts! I had to turn around and say to my friend in the middle of a song that it is unnecessary for someone to have that much talent. Especially someone so tiny! She told me to shut up and listen to the rest of the show.

    I obeyed and was mesmerized by Katy's talent and love for what she does. It was so much fun to see her presenting and rocking out to her music. If you want to check out her album, it's available on I-Tunes.
    What is my friend Whit's response to Katy's new album? Thumbs up! And that means a lot because her thumb is freeeeezing from the icy temperatures here!

    Monday, February 8, 2010

    Superbowl Cookies

    Unlike most other bloggers out there, I, being the splendiforous person I am, post superbowl recipes AFTER the superbowl. It's my way of being a rebel.


    And don't even think its because I procrastinate too much to make things ahead of time! Cause that's not the reason and even if it was, I would never admit it (except I would and it is).

    I made these cookies with the usual recipes. And Spice even helped me decorate this time! Although I think she thought it was too stressful and I'll probably be on my own decorating from now on!


    Spice and I journeyed to Hoboken, New Jersey to watch the superbowl at Spice's boyfriends' apartment. That pretty much came down to Spice, me and 10 boys. It was a good time =)

    Once the boys sat down, they didn't move other than to refuel on food, of which there was a ton!


    Spice and her bf gave a thumbs up to the Saints in the second half. Don't tell them they look adorable. I never do. =)


    The boys seemed to enjoy my cookies. Just look at what Ryan is thinking here. And ignore the fact that I totally made it up.


    Lastly, I had an epic adventure back home after the game last night. I'll share the hoola hoops I had to jump through to get to my front door later this week!


    Greek Celebration Bread : Christopsomos


    Week two of the Bread Bakers Challenge came and went without a hitch. After checking out the ingredient list I was prepared for a super sweet bread, but the finished product was mild and slightly cakey. What is wonderful about this bread is its versatility. You can switch out any of the dried fruits, or try another citrus base. I would love to try this again with dried cherries and pecans!

    Although this one was not my favorite Sugar ate almost the entire loaf, literally! All that remained after two days were tiny slivers of the ends.

    If you want to try this recipe as is, I would recommend adding orange extract rather than juice, to increase the sweetness a little.


    Christopomos

    7 ounces of poolish (receipe follows)

    16 ounces unbleached bread flour

    1 tsp salt

    1 and 1/2 tsp instant yeast

    1 tsp ground cinnamon

    1/4 tsp ground nutmeg

    1/4 tsp ground allspice

    1/4 teaspoon ground cloves

    1 tsp minced orange zest

    1 tsp almond extract

    2 eggs slightly beaten

    1/4 cup of honey

    1/4 cup of olive oil

    3/4 cup of milk

    1/2 cup golden raisens

    1/2 cup crasins

    1/2 cup chopped walnuts


    Glaze:

    2 tbsp water

    2 tbsp sugar

    2 tbsp honey

    1 tsp orange juice


    Poolish: (makes 11.5 ounces)

    1.25 cups unbleach bread flour

    3/4 cups of water, room temp

    1/8 tsp instant yeast

    Day 1, make the poolish:

    Stir together ingredients in the bowl of your mixer until flour is hydrated (it should look like a really thinck pancake batter). Cover bowl with plastic wrap and leave at room temp for ¾ hours. Put in the fridge overnight.

    Day 2, make the dough:

    Remove poolish from fridge and let come to room temperature

    Mix together poolish, flour, salt, yeast, cinnamon, nutmeg, allspice, and cloves. Mix on low until dough forms a ball then increase speed to medium and kneed for 5 minutes, add in the raisns, crasins, and walnuts, kneed for 5 more minutes on medium speed. The dough should be tacky and supple.

    Transfer dough to a slightly oiled bowl, roll to cover in oil. Cover with plastic wrap and let ferment for 90 minutes, dough should double in size.

    Divide dough into two pieces, one should be double the size of the other. Shape the larger piece into a ball and transfer to a sheet pan lined with parchement, mist the top of the dough with cooking spray and cover with plastic wrap. Let proof for 90 minutes, dough ball should double in size again. Place the smaller piece of dough in a plastic bag and let chill in the fridge.

    Preheat overn to 350 degrees with the oven rack on the middle shelf.

    After the 90 minute proof time, take the small piece out of the fridge, divide in two, and roll each into a 10 inch strand. Drape each piece over the ball creating an X. You can get fancy here and create a little design with the ends. I split each end with a pastry scraper and coiled them around the base of the bread.

    Bake for 20 minutes then rotate back 180 degrees and continue baking for another 20 minutes. It should be golden brown and register about 190 internal temp. Glaze the bread as soon as it comes out of the oven.

    To make the glaze:

    Combine the water and sugar in a sauce pan and bring to boil. Add honey and juice, and cook lightly.

    Cool bread 1 hour before slicing

    Friday, February 5, 2010

    5-Minute Chocolate Cake

    So you get home, you've had a long day, not even your favorite tv show is keeping the pms at bay and you want some cake. Now. Chocolate cake to be exact and you will not rest until you have it.

    Solution: 5 minute chocolate cake.

    This little dude is made in the microwave. Did I just blow your mind? Because it did for me the first time I heard about it.

    Between one of my roommates getting mad at me everytime I bake cookies because she swears I'm making her fat (I can't really blame her, now, can I?) and my co-workers saying the same thing, I decided a little single portion post would keep the yelling at bay (of course they always eat it, oh and ah at me, and then yell at me 5 minutes later).

    Now, this is not the best chocolate cake in the world. It's a little spongy and a bit on the dry side. It is cake, however. Chocolate cake. And made in about 5 minutes.

    Emphasis here is speedy and chocolatey. This will cure that chocolate cake craving that just wont go away. Go forth and be pms-ey (is that weird to say? whatever).

    5-Minute Chocolate Cake

    4 tablespoons cake flour
    4 tablespoons sugar
    2 tablespoons unsweetened baking cocoa
    1 egg
    3 tablespoons milk
    3 tablespoons oil
    3 tablespoons chocolate chips
    Dash of vanilla

    Add the dry ingredients to a coffee mug and mix well.

    Add the egg and mix again.

    Pour in the milk and oil and mix yet again.

    Add the chocolate chips and vanilla and, would't you know it, you mix again!

    Microwave mug for 3 minutes at 1000 watts.

    Allow the cake to cool a little before overturning on a plate.

    Thursday, February 4, 2010

    Chocolate Pistachio Biscotti

    Things I found amazing about this biscotti:

    1. It wasn't too crunchy like some biscotti is.
    2. It has a great, deep chocolate flavor.
    3. The salty pistachios perfectly compliment the sweet chocolate.

    Things I found disappointing about this biscotti:

    1. I ate 4 in one night, immediately following nacho night.
    2. I wanted to eat at least 4 more.
    To sum up, probably the best bisoctti I've ever had. Nuff said. =)


    On a side note: I am sitting here singing Lady Gaga's "Bad Romance" (which you should listen to if you haven't heard it), so if there are random song snippets in this post, I beg forgiveness.


    Chocolate Pistachio Biscotti
    Martha Stewart's Cookie Book

    6 tablespoons unsalted butter, at room temperature
    2 cups all-purpose flour
    1/2 cup unsweetened cocoa powder
    1 teaspoon baking soda
    1/4 teaspoon salt
    1 cup sugar

    "Gaga Oo-La-la-a"

    2 large eggs
    1 cup shelled pistachio nuts
    1/2 cup semi-sweet chocolate chips

    Preheat oven to 350 degrees F. Grease a baking sheet and set aside.

    In a medium bowl, whisk together flour, cocoa powder, baking soda and salt. In the bowl of an electric mixer fitted with the whisk attachment, cream butter and sugar until light and fluffy. Add eggs and beat until well-combined. Add flour mixture and stir to form a stiff dough. Stir in pistachios and chocolate chips.

    "caught in a bad romance....ah-la-la-la"

    Transfer dough to prepared baking sheet; form into a slightly flattened log, about 12 by 4 inches. Bake until slightly firm, about 25 minutes. Cool on a wire rack for 5 minutes. Reduce oven temperature to 300 degrees F.

    On a cutting board, using a serated knife, cut biscotti diagonally into 1-inch thick slices. Arrange biscotti, side down, on baking sheet and bake about 8 minutes.

    "Roma-roma-ma. Gaga ooh la-la"

    Tuesday, February 2, 2010

    Stromboli

    Have you ever eaten stromboli? Oh goodness, if you haven't, get thee to a strombol-ery (I just made that up, they probably don't exist)!

    Bananie's mom (whom we lovingly refer to as Mama Stromboli) has been making this miracle of nature for us since before Bananie even moved in! We put in a special order with her for every party we throw and let me tell you, our parties are the best simply BECAUSE of this stromboli!

    Unfortunately, we decided to try to make our own the other night and realized how insanely easy it is to make. Bummer (for my hips, not my tastebuds). I don't have a recipe, but I'll take you through it!

    First get some pizza dough. We used some from a bakery near us. Roll it out and top it with an assortment of goodies. We made three stromboli:
    1. Cheese (any assortment will suffice)
    2. Mozzerella and Spinach
    3. Salami, pepperoni and cheese


    Roll the stromboli up and tuck in the ends. Place them on a baking sheet and brush with an egg wash.

    Place in a preheated oven at 375 degrees F. Bake for 30-40 minutes. Salivate at the glistening, seeping, melty cheesy goodness...
    Slice and dip into marinara sauce. This is the spinach dude.

    I told you it was easy, didn't I?! And I would NEVER lie to you ;)

    Monday, February 1, 2010

    Skiing 101

    Bananie took me skiing this past weekend. I used to ski when I was little, but as I got older, flying down a mountain strapped to two sticks of wood just didn't peak my excitement. Nonetheless, Bananie wont stop talking about this "fun" activity and I just had to see for myself. She made me get up at the buttcrack of dawn. Thankfully she brought me a bagel and I got to watch the sunrise as we drove up to the mountain.

    "AHHHH! Annie! The sky's on fire!!!!! We'd better go back to bed!

    Promptly upon attaching the skiis to my boots (which had my feet in a grizzly death grip), I managed to slide backwards and fall in a tangled heap; skiis, hair, legs and arms on completely different planets. I dissolved into a full-on heave laugh while 5 year olds whizzed past me (and the little punks didn't even have poles! Showoffs....)

    Luckily once I took a run down the baby-hill, muscle memory kicked in a teensy weensy bit and I advanced to the beginner slopes! Whew! Chair lift here I come!

    The views were gorgeous and we lucked out on a superbly beautiful day!

    (aka I couldn't stop snapping pictures)

    Unfortunately, oil from the chair lift managed to drip itself (jerk) onto both Bananie and my's jackets. Poor Bananie's white jacket looked like a bird had taken a liking to her. She ended up with an "ski ambassador's jacket".

    Whatever that means.

    Bananie had to alert the media about what happened to her jacket while were take a jolly ride (oil-free, I might add) on the chair lift.

    The easiest way I found to ski was to play "follow the leader" down the hill, playing a 4-year old to Bananie the "ski ambassador".

    Every once in awhile I would release my ambassador and let her loose down the mountain.

    Woah! Bananie, please don't die. I'll make you something sweet when we get home.

    By the end of the day, with my feet perfectly numb both from the darn vice-like boots and the cold, I was skiing like a pro.

    And by "pro" I mean I took up what we called the "granny stance": butt way back and hunched over my knees. What a sight!

    Good thing we didn't get a picture of that! ;)