Showing posts with label Cookies. Show all posts

Saturday, November 26, 2011

Ginger and Cardamom Cookies


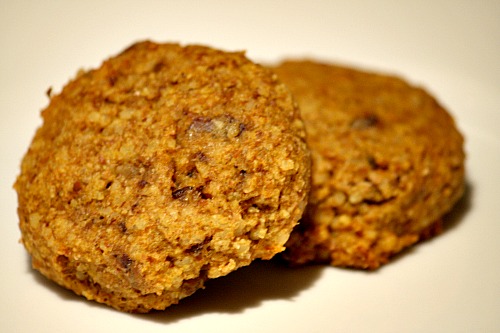
I really loved these cookies. They were crispy on the outside and chewy on the inside. Perfect, in my opinion. I also just love the look of the crackle cookies. They just look so rustic! The hint of cardomom was excellent, and who doesn't like cardomom?!

Ginger and Cardomom Cookies

SP Cookie Queen

2 1/4 cups all-purpose flour
1 teaspoon baking soda
2 teaspoons ground cinnamon
1 teaspoon ground cloves
1/2 teaspoon ground cardamom
1/2 teaspoon ground ginger
1/2 teaspoon salt
1 1/4 cups light brown sugar, loosely packed
1/3 cup vegetable oil
2 large eggs
2 ounces crystallized ginger, finely chopped
1/2 cup granulated sugar + 1/2 teaspoon ground cardamom

Preheat the oven to 350 degrees F.

Line two cookie sheets with parchment paper or use silpats.

Sift flour, baking soda, cinnamon, cloves, 1/2 teaspoon cardamom, ground ginger and salt into a large bowl. Set aside. I ended up using ground cardamom because that was all I could find out here in the boonies where I live, but if you can find the pods that would be even better; you can then grind them yourself.

In a large bowl add the brown sugar and oil and mix till combined. Add the eggs and mix till combined. Add the flour mixture and mix until combined. Add the crystallized ginger and mix until combined. The mixture will seem a bit dry, but it will hold together nicely.

In a small bowl combine the granulated sugar and 1/2 teaspoon cardamom. Set aside.

Scoop the dough into large tablespoon sized balls and flatten out the balls a bit with your hands, then roll in the sugar mixture. Place the cookies on a baking sheet 3-inches apart. Bake for 13 -15 minutes. Let cool on the pans. Don't wait for the cookies to be completely set when you pull them out and they will remain chewier.

Tuesday, October 25, 2011

Healthy Pumpkin Cookies

I have been so incredibly lazy when it comes to blogging lately! I have been baking, not at the same frequency I used to, but it has mostly been things I have already made and posted before. Or I'm just too tired from running my butt off to be bothered with photographing. But, for a split second one morning at 7am, after a 6 mile run, I found the will to photograph the last few of these cookies I had left. No natural light, so excuse the picture.

I really loved these cookies. They are almost like a Lara Bar with pumpkin. They taste chewy, probably from the dates, but are easy to put together as long as you have a food processor!

Healthy Pumpkin Cookies
Fun and Food Cafe

2 cups pecans, toasted and cooled
1/2 cup rolled oats
1 cup whole wheat pastry flour
1 teaspoon baking soda
1/2 teaspoon sea salt
1 teaspoon ground cardamom
1/4 teaspoon ground nutmeg
3/4 cup puréed pumpkin
1 tablespoon orange zest
3/4 cup freshly squeezed orange juice
2 teaspoons vanilla extract
1 cup chopped, pitted dates
4 tbsp honey

Take a baking sheet and roast your pecans for about 10 minutes, watching them carefully so they do not burn. you can also do this on a stove in a wok. or you can buy Toasted Pecans in the first place.

Preheat oven to 375°F. Line two baking sheets with parchment paper. Put pecans and oats in the bowl of a food processor. Pulse until a fine meal forms, about 25 times. Add flour, baking soda, salt, cardamom and nutmeg to the ground meal and pulse another 20 times to combine all the ingredients. Transfer to a large mixing bowl.

Add pumpkin, orange zest, orange juice, honey, vanilla extract and dates to the food processor. Blend until a smooth puree forms, scraping the sides down occasionally, about 1 minute.

Make a well in the center of the dry ingredients. Scrape the pumpkin mixture into the well and fold all the ingredients together with a large spatula.

Scoop about 2 tablespoons of batter onto the prepared baking sheets, spacing them about 1 1/2 inches apart. Flatten the batter slightly. Bake 20 minutes, until the bottoms are just browned. Remove to a cooling rack and cool slightly before serving. Store in an airtight container.

Monday, May 30, 2011

Soft Peanut Butter Cookies

These were a healthier peanut butter cookie. I brought them for a sweet afternoon treat during the week. These were moist and very peanut buttery!

Soft Peanut Butter Cookies
From Oh She Glows

2 cups whole wheat pastry flour
1 teaspoon baking soda
3/4 teaspoon kosher salt
1 cup peanut butter (I used all natural)
3/4 cup pure maple syrup
1 1/2 teaspoons vanilla extract
1/4 cup almond milk
Sugar for sprinkling

Preheat oven to 350 degrees F. Line a baking sheet with parchment paper or a non-stick mat. In a medium mixing bowl mix the flour, baking soda and salt. In another large bowl, combine the peanut butter, maple syrup and vanilla. Stir until combined. Pour the flour mixture over the peanut butter mixture and combine. Place the batter into the fridge for 30 minutes to set.

Remove from fridge and shape into 1-2 inch balls, place on baking sheet. Bake for 11 minutes at 350 degrees and let cool for 5 minutes.

Sunday, May 8, 2011

Peanut Butter and Chocolate Snack Bars


I'm baaack! Sorry the site was down for so long. Believe me, I missed it as much as some of you did! And hopefully there wont be any more unexpected interruptions! Back to the food!

These were a great bar cookie that I sort of used as an energy bar as well. Obviously, with my sweet tooth extraordinaire, I'm always looking for ways to cut back on sugar! I loved these bars and have made them several times.

Peanut Butter and Chocolate Snack Bars
Jenna Laughs

3 tablespoons softened butter
1/3 cup sugar
1/2 cup brown sugar
1 egg
1/3 cup peanut butter
1/2 teaspoon vanilla extract
1 tablespoon unsweetened cocoa powder
1/4 cup flour
1/2 cup whole wheat flour
2 tablespoons milled flax seed
1 cup whole oats
1/2 teaspoon baking soda
1/4 teaspoon salt
1 cup dark chocolate chips

Preheat oven to 350 degrees F. In a large mixing bowl, beat butter and sugars on medium speed until creamy; 4-5 minutes. Add egg, vanilla and peanut butter. Beat until combined. Add cocoa powder and beat on low speed.

In a separate bowl, combine flours, flax seed, oats, baking soda and salt. Mix together. Combine dry ingredients into wet ingredients and stir until moistened. You may need to use your hands to get it all combined. Add chocolate chips and combine. Pour mixture into an 8-inch baking sheet fitted with aluminum foil or parchment paper. Bake for 18-20 minutes.

Tuesday, March 29, 2011

Chewy Coconut Cookies


These are definitely a new favorite cookie. They are super chewy and quite delicious with the coconut. I will certainly be making these again!

Chewy Coconut Cookies
allrecipes.com

1 1/4 cups all purpose flour
1/2 teaspoon baking soda
1/4 teaspoon salt
1/2 cup butter
1/2 cup packed brown sugar
1/2 cup white sugar
1 egg
1/2 teaspoon vanilla extract
1 1/3 cups flaked coconut

Preheat oven to 350 degrees F (175 degrees C.) Combine the flour, baking soda, and salt; set aside.

In a medium bowl, cream the butter, brown sugar, and white sugar until smooth. Beat in the egg and vanilla until light and fluffy. Gradually blend in the flour mixture, then mix in the coconut. Drop dough by teaspoonfuls onto an ungreased cookie sheet. Cookies should be about 3 inches apart.

Bake for 8-10 minutes, until lightly toasted. Cool on wire racks.

Sunday, March 13, 2011

Cocoa Fudge Cookies


These were a great chocolate cookie. Very chewy. And they sort of taste like a brownie. Love. 


Cocoa Fudge Cookies
Cooking Light

1 cup all-purpose flour
1/4 teaspoon baking soda
1/8 teaspoon salt
5 tablespoons unsalted butter
7 tablespoons unsweetened cocoa powder
2/3 cup granulated sugar
1/3 cup packed brown sugar
1/3 cup plain non fat yogurt
1 teaspoon vanilla extract

Preheat oven to 350°.

Combine flour, soda and salt; set aside. Melt butter in a large saucepan over medium heat. Remove from heat; stir in cocoa powder and sugars. Add yogurt and vanilla. Stir to combine. Add flour mixture, stirring until moist. Drop by tablespoons onto a greased cookie sheet. 

Bake at 350 degrees for 8-10 minutes. Cool on pans 2-3 minutes or until firm. Remove to wire racks to cool completely.

Thursday, March 3, 2011

Peanut Butter Oatmeal Chocolate Chip Cookies


Yes, I know. I have neglected my little blog here. And for that I am sorry! Lots of new stuff going on though, which is good, but leaves little for other outlets! The end of February was busy busy busy! I acquired two new jobs, both which I love and are a nice transition from dancing from me (which I am still doing when I can). Spice and I also moved, but just downstairs in our apartment complex to a two-person apartment. 

Needless to say, very little time and mental capacity for blogging! Which means my blogging style is probably going to change and you will be seeing less posts. I thought about whether I wanted to continue the blog and ultimately decided that I love having all my favorite recipes in one electronic place, with my thoughts on how I liked it. That being said, I will not only be baking less, but probably wont blog unless something is outstanding! Which I mostly do anyways since I would never want to share a less than stellar recipe!


I was craving a peanut butter cookie a few weeks ago and these were definitely a great find! I loved the hearty combo of the oats and peanut butter and the subtle chocolate that comes through too!


Peanut Butter Oatmeal Chocolate Chip Cookies
Brown Eyed Baker

1 cup all-purpose flour
1 teaspoon baking soda
¼ teaspoon salt
1 stick (½ cup) unsalted butter, at room temperature
½ cup creamy peanut butter
½ cup granulated sugar
1/3 cup light brown sugar
½ teaspoon vanilla extract
1 egg
½ cup rolled oats
1 cup semisweet chocolate chips

Preheat oven to 350 degrees F. Line two baking sheets with parchment paper and set aside.

Whisk together the flour, baking soda and salt; set aside.

On medium speed, cream together the butter, peanut butter, granulated sugar, brown sugar and vanilla extract, about 3 minutes. Add the egg and beat to combine. On low speed, gradually add the flour until just combined. Stir in the oats, and then the chocolate chips.

Use a large cookie scoop (3 tablespoons) and drop dough onto prepared baking sheets about 2 inches apart. Bake for 10 minutes, or until the cookies are lightly golden. Cool completely on the baking sheet and then store in an airtight container at room temperature.

Wednesday, February 2, 2011

Peanut Butter Banana Cookies


During a particularly icy and no-bueno weather day here in New York, I leave you with some hearty cookies to tame the cold-weather blues.

I found these almost a granola-type cookie, but loved them all the same! They were soft but I loved the hearty texture of the oats, the banana and peanut butter together. Next time I make these I think I would try whole wheat flour as it would definitely add to the hippie cookie.

Peanut butter drizzle equals yum. Trust me.


Peanut Butter Banana Cookies
Two Peas and Their Pod

1 ¼ cups all purpose flour
1 teaspoon baking soda
1/2 teaspoon salt
1/4 teaspoon cinnamon
4 tablespoons unsalted butter, at room temperature
1/2 cup light brown sugar, packed
1/4 cup granulated sugar
1/3 cup smooth peanut butter
1 tablespoon honey
1 teaspoon vanilla extract
1 large egg
1 large ripe banana, mashed (about 1 cup)
2 cups old fashioned oats

3 tablespoons smooth peanut butter
1/2 cup powdered sugar
2 tablespoons milk
1 tablespoon honey

1. Preheat the oven to 350 degrees. In a medium bowl, whisk together flour, baking soda, salt, and cinnamon. Set aside.

2. In the bowl of a stand mixer, combine butter and sugars, mix until smooth. Add peanut butter, honey, vanilla extract, and egg. Combine until smooth. Next, add the banana and mix until combined.

3. Slowly add in flour mixture until just combined. Stir in the oats.

4. Drop cookie dough by heaping tablespoonfuls 2 inches apart onto baking sheets that have been lined with parchment paper or Silcone baking mats.  Bake at 350 degrees F for 12-15 minutes or until golden. Remove cookies from pans; cool completely on wire racks.

5. To make the glaze-combine peanut butter, powdered sugar, milk, and honey in a small bowl. Whisk until smooth. If it is too thick or thin, adjust by adding more milk or powdered sugar. Drizzle glaze over cooled cookies.

Monday, January 24, 2011

Gingersnaps


This past holiday season, I became a slave to the subtle and spicy flavor of ginger. In everything! I was craving gingerbread like it was going out of style! When I came home for Christmas, I decided to share the love with my parental units and made these gingersnaps.

I couldn't get over how good these were! They are very soft and chewy, but in a good way. Even a certain someone who prefers her cookies crisp loved these! They were very easy as well. No mixer or beaters needed. Just two bowls. 

Were having a cold snap here in the Northeast. I recommend making these if you are too! They will warm you up for sure!

Gingersnaps
17 and Baking 

2 cups all purpose flour
2 tsp baking soda
2 tsp ground cinnamon
2 tsp ground ginger
1 tsp ground cloves
Pinch of salt
1 cup packed light brown sugar
1/4 cup molasses
3/4 cup canola oil
1 large egg
Sugar for rolling (I like evaporated cane juice or raw sugar)

Whisk together the flour, baking soda, spices, and salt in a medium bowl. In another bowl, combine together the brown sugar, molasses, canola oil, and egg until smooth. Mix the flour mixture into the brown mixture, stirring until dough comes together. Cover with plastic wrap and chill for 20 minutes.

Preheat the oven to 375 degrees and line baking sheets with parchment paper. Scoop up bits of dough by the heaping teaspoonful and roll into balls between your palms, about the size of a quarter. Roll the balls in sugar and place on the baking sheets 2 inches apart. Bake 8 minutes – if you like crispy gingersnaps, try 9-10 minutes.

Cookies will be very soft but will firm up. Leave on the baking sheet several minutes, then transfer to a wire rack to cool completely.

Friday, January 21, 2011

French Butter Cookies


When I saw these cookies on Annie's Eats before Christmas, I knew I was going to have to make them. I remember my mom coming home with a big tin of these butter cookies for the holidays several years in a row. I remember loving them! And, of course, eating too many. 


These cookies are just as great, if not better than those you get out of a big tin. They have a delicious buttery flavor, and are soft and crumbly. I made these for the family over Christmas and we literally ate them all in under one week!

They are definitely a process. It took me most of an afternoon to crank these out, but it was soooo worth it. It was also a fun process!


French Butter Cookies
Annie's Eats

1 large egg
10 tablespoons unsalted butter, softened
1/3 cup plus 1 tablespoon sugar
1/4 teaspoon salt
1 teaspoon vanilla extract
1 1/2 cups unbleached all purpose flour

1 large egg white
Turbinado sugar for sprinkling 

Place the egg in a small saucepan and cover with 1 inch of water.  Bring to a boil.  Once boiling, remove from the heat, cover and let sit 10 minutes.  Meanwhile fill a small bowl with ice water.  Use a slotted spoon to transfer the egg to the ice water and let stand 5 minutes.  Crack the egg and peel away the shell.  Separate the yolk from the white; discard the white.  Press the yolk through a fine mesh sieve into a small bowl.

In the bowl of an electric mixer, combine the butter, sugar, salt and cooked egg yolk.  Beat on medium speed until light and fluffy, about 4 minutes, scraping down the bowl as needed.  Turn the mixer to low, add the vanilla and mix until incorporated.  Add the flour and mix on low speed just until combine, about 30 seconds.  Use a spatula to press the dough into a cohesive mass.

Divide the dough in half and roll each piece into a log about 6 inches long and 1¾ inches in diameter.  Wrap each log in a piece of parchment or wax paper.  Twist the ends to seal and firmly compact the dough into a tight cylinder.  Chill in the freezer until firm, about 1 hour.  (At this point, the dough can be stored in a freezer bag and frozen for up to 2 weeks.)

To bake, preheat the oven to 350 ˚F.  Line baking sheets with parchment paper.  Using a chef’s knife, slice the dough into ¼-inch thick rounds, rotating the dough log every few slices so that it does not become misshapen.  Place the cookies 1 inch apart on the prepared baking sheets.  Brush lightly with the egg white mixture and sprinkle evenly with turbinado sugar.

Bake until the centers of the cookies are pale golden and the edges are slightly darker, about 15 minutes, rotating the baking sheets halfway through baking.  Cool on the baking sheets about 5 minutes, then transfer to a wire rack to cool completely.

Variations: 
Vanilla Pretzel Cookies
Follow the recipe for French Butter Cookies, increasing the vanilla extract to 1 tablespoon and reducing the chilling time to 30 minutes.  Slice the dough into rounds as instructed.  Form each round into a ball.  Roll into a 6-inch long rope with tapered ends.  Twist into a pretzel shape.  Brush with the egg white mixture, sprinkle with turbinado sugar and bake as instructed.

Chocolate Sandwich Cookies
Follow the recipe for French Butter Cookies.  Slice the dough into 1/8-inch thick rounds.  Omit the egg wash and sprinkling sugar.  Bake the cookies as directed, reducing the baking time to 10-13 minutes.  When all the cookies are completely cool, melt dark or semisweet chocolate, spread a thin layer onto one cookie and sandwich with another cookie.  Let sit until the chocolate has set completely.

Black and White Spiral Cookies
Make one batch of French Butter Cookie dough.  Make a batch of chocolate dough by following the recipe for French Butter Cookies, reducing the flour to 1 1/3 cups and adding ¼ cup Dutch-processed cocoa powder with the flour.

Wednesday, December 29, 2010

Gingerbread Biscotti


This was a great gingerbread biscotti recipe. The biscotti are, in my opinion, perfect. I like my biscotti crisp, but chewable on their own, without having to dunk it in coffee. This definitely fit the bill. The outside was crumbly and crispy, but the inside had a slight chewiness. 


And, of course, I loved the gingerbread flavor. I wish it was kosher to make gingerbread year round because I love it so. Although, I'm sure I COULD make it year round and my roommates would be the only ones who knew! Hmmmm =)


Gingerbread Biscotti
Cookie Madness 

1 3/4 cups flour
1 1/2 teaspoons baking powder
2 teaspoons ground ginger
1 1/2 teaspoons ground cinnamon
1/2 teaspoon ground nutmeg
1/2 teaspoon salt
1/2 cup vegetable oil
1/4 cup mild molasses
2/3 cup sugar
2 tablespoons ground flax seeds
2 tablespoons milk or a non-dairy milk like soy milk or almond milk
1 teaspoon pure vanilla extract

Preheat oven to 350ºF. Line a baking sheet with parchment paper.

Mix the flour, baking powder, ground ginger, cinnamon, nutmeg and salt together in a bowl and set aside.

Whisk oil, molasses, sugar, ground flax seeds, milk, and vanilla together in a mixing bowl.

Stir the flour mixture into the liquid mixture and form a smooth dough.  Gently knead in the pecans and cranberries (or ginger, if using).

On a cookie sheet (I lined mine with parchment, but you can use a Silpat or just lightly grease), form a log about 11 inches long by 4 inches wide.   Flatten the end sides of the log. Bake for 28 to 30 minutes until the log is puffed and firm but not too brown. It will spread a little, and some cracking is okay. Allow log to cool for about 45 minutes.

Preheat the oven to 325ºF. Very carefully, slide the log off the baking sheet and onto a cutting board. With a sharp, heavy knife, (I had better luck with a Chef’s knife than a serrated knife) cut log into ½-inch-thick slices, using one quick and firm motion, pressing down into the log. Very gently move slices to the baking sheet, standing them of their bottom edge if possible. Rebake the slices for 22 to 24 minutes. The slices should appear dry and slightly toasted, but do not allow them to get too browned. Allow the biscotti to cool 10 minutes on the baking sheet, then carefully move them to the wire racks to complete cooling (warm biscotti may be fragile).

Sunday, December 19, 2010

Whole Wheat Biscotti with Nuts and Dried Fruit


Whole Wheat Biscotti with Nuts and Dried Fruit
Fit Sugar

1 1/4 cups whole wheat pastry flour
1 teaspoon baking powder
1/3 cup sugar
1/4 teaspoon salt
1/2 cup chopped nuts (I used walnuts)
1/4 cup dried fruit, chopped (I used dried cherries and apricots)
2 large eggs
1 teaspoon pure vanilla extract
1 tablespoon molasses

Preheat oven to 350 degrees. Brush a baking sheet with oil; set aside. In a medium bowl, whisk together flours, sugar, baking powder and salt; stir in nuts and dried fruit. Set aside.

In a small bowl, whisk together the eggs, molasses and vanilla. Add to flour mixture; stir just until combined.

On a lightly floured surface, pat dough into a loaf about 1 inch thick, 2 1/2 inches wide (about about 7 inches long); transfer to baking sheet. Bake until risen and firm, 20 to 25 minutes; cool completely on sheet. Reduce oven temperature to 300 degrees.

Place loaf on a cutting board, and using a serrated knife, cut diagonally into 1/4 inch-thick slices; place slices in a single layer on sheet. Bake, turning once, until dried and slightly golden, 25 to 30 minutes; cool completely. Store in an airtight container at room temperature up to 1 month.

Tuesday, December 14, 2010

Peppermint Chocolate Crinkle Cookies


Its so hard for me to pick a favorite accompaniment for chocolate. I am hopelessly devoted to peanut butter and chocolate, but my old friend, peppermint and chocolate, sometimes rears it's head in my face and I have to silence it. When I saw these cookies, I knew they would be perfect. The dense and chocolatey crinkle cookie is divine on its own. But adding peppermint extract? Sign me up!

As you can imagine, these cookies are great. The peppermint is very prevalent and, as always, works so well with the dense chocolate of the cookie. I made these extra large and they were great on a cold night with a glass of ice-cold milk!

Peppermint Chocolate Crinkle Cookies
Bakers Royale 

1 3/4 cup plus 2 tablespoons spooned and leveled bleached all-purpose flour
1 1/2 teaspoons baking powder
1/2 teaspoon salt
8 ounces semi-sweet chocolate, finely chopped
2 3/4 cups sugar, divided
1/4 cup canola oil
2 tablespoons unsalted butter, melted
2 tablespoons light corn syrup
2 large eggs
1 large egg yolk
2 teaspoons pure vanilla extract
1 1/2 tablespoons peppermint extract
1 cup sugar

in a medium bowl, beat together the flour, baking powder and salt; set aside. Melt the chocolate in the microwave on 50 percent power for 1 minute, stir, and microwave for 15 seconds more and stir; set aside. (I had to do another minute in the microwave because my chocolate wasn't quite melted yet)

In a mixer with the paddle attachment, beat together 2 1/2 cups of the sugar, the oil, butter and corn syrup to blend. Beat in the eggs, egg yolk, vanilla and peppermint extract. Then on low, beat in the melted chocolate. Add the flour mixture and beat in on low speed. Wrap the dough in plastic and refrigerate for several hours or overnight (the longer the better).

Heat oven to 325 degrees F. Line baking sheet with parchment (or a silipat). Take out about one-quarter of the dough at a time to shape. Roll the dough into 2 inch balls. Pour the remaining 1/4 cup granulated sugar into one bowl and the confectioners' sugar in another bowl. Roll each cookie dough ball lightly in granulated sugar first, then very heavily in the confectioners' sugar (apparently rolling them in granulated sugar first helps the confectioners' sugar to stay on the surface better and not soak in!).

Arrange cookies 2 inches apart on the foil. For crisp cookies, bake 12 to 14 minutes. For a chewier cookie, bake 10-12 minutes.

Tuesday, December 7, 2010

Peanut Butter Cups


I really don't have a recipe for this. I saw the idea on a blog that I can't remember and figured I could just go by feel with these. I encourage you to do the same! The best part about them is that you can use whatever chocolate you'd like! I used Ghirardelli chocolate chips, but you could go with Nestle or even some great high-end stuff! You can also choose your filling. I used peanut butter and Nutella, but you can really use whatever you'd like. I really love these and have kept them in my freezer, pulling one out when I want a punch of chocolate and peanut butter!

Peanut Butter Cups

1 package of semi-sweet or dark chocolate chips
1-2 spoonfuls of coconut oil
Peanut butter

Melt the chocolate chips and coconut oil in the microwave. Pour a small amount into the bottom of a mini muffin pan. Place in the freezer for 10 minutes to let set.

Remove and place a dollop of peanut butter into each cup. Fill with remaining melted chocolate until the peanut butter disappears. repeat with each cup.

Place back in the freezer until set, about 30 minutes. Remove from the muffin cups and enjoy! I store these in the freezer, but you can also store them in the fridge!

Monday, December 6, 2010

Oreo Cheesecake Cookies


It's finally holiday time! I thought it would never come. I look forward every year to holiday baking, holiday decorations and, of course, watching Elf as many times as possible. So get ready for lots of holiday cookies! 

These cookies are just such a brilliant idea. Cream cheese cookie center, rolled in Oreo and drizzled with chocolate. I want to kiss whoever came up with that combo because it really is just genius! I loved these cookies. They were chewy and soft in the center and crispy on the outside. And there was a perfect combo between cream cheese tang with Oreo sweetness!


Oreo Cheesecake Cookies
From Multiply Delicious

1/2 cup of (1 stick) unsalted butter, softened
3 ounces of Philadelphia Cream Cheese
1 cup of sugar
1 tsp. of vanilla extract
1 cup of all-purpose flour
1/2 cup of mini chocolate chips
1 cup of oreo cookie sandwich crumbs
1/2 cup of white chocolate chips, melted (optional)


Preheat oven to 375 and line two baking sheets with parchment paper. Set aside.

In a large bowl, cream together the butter and cream cheese using a hand mixer until they are well combined.

Add the sugar and vanilla and mix until ingredients are well combined. Add the flour and mix on low until the flour is incorporated. Stir in mini chocolate chips.

Scoop the dough into 1″ balls (I used a scoop to insure all measured the same) roll in oreo cookie crumbs so cookie is covered. Place covered cookie balls onto the prepared baking sheet. Bake for 12 to 15 minutes, or until the edges are golden and the tops are slightly puffed.

Cool on the pan for two minutes before transferring to a wire rack to cool. Once cool, drizzle cookies with melted white chocolate. Enjoy!

Friday, December 3, 2010

Snickerdoodle Pinwheel Cookies


Who doesn't love a good snickerdoodle cookie? Its always up there on the list of people's favorites. I happen to be a very big fan of snickerdoodles. The sheer simpleness of sugar and cinnamon together brings a smile to my lips (and an inch to my hips) everytime.

These are a slightly different type of snickerdoodle. They are more crumbly than their drop cookie counterparts, but still pack that cinnamon punch! I loved the look of these, they are a bit more elegant in appearance than the usual snickerdoodle and would look lovely on a cookie platter for the holidays!

Snickerdoodle Pinwheel Cookies
From Fake Ginger 

1/2 cup unsalted butter, softened 
3 ounces cream cheese, softened 
1 cup sugar 
1 egg 
1 teaspoon vanilla 
2 2/3 cups all-purpose flour 
1/2 teaspoon baking powder

1/3 cup sugar 
1 tablespoon cinnamon 
1 tablespoon butter

Cream butter, cream cheese, and sugar in a large mixing bowl until light and fluffy. Add in egg and vanilla; beat until combined. Sift in flour and baking powder. Mix just until combined, being careful not to overmix. Dump dough onto counter and knead 2 or 3 times just to incorporate any leftover flour. Divide into 2 discs and wrap in plastic wrap. Refrigerate for about an hour.

To make cinnamon mixture, combine sugar and cinnamon. Melt butter; set aside.

Working with one disc of dough at a time, roll out into a 12 x 8 inch rectangle on a floured surface. Brush dough with half of the melted butter. Sprinkle with half of the cinnamon mixture. Starting from one of the short sides, roll into a tight log. Wrap in plastic wrap. Repeat with other disc. Refrigerate for at least 4 hours.

When ready to bake, preheat oven to 375F.

Use a sharp knife to cut dough into 1/4-inch rounds; place on ungreased baking sheet. Bake for 8 to 10 minutes or until edges are just slightly golden. Cool on wire rack.

Monday, November 15, 2010

Oatmeal Pumpkin Cookies


My favorite type of cookies are chewy and chunky. By chunky, I mean some type of chip is in there somewhere. Although I love all of the pumpkin cookies I have made thus far in my life, I am on a mission to find a chewy, as opposed to a soft, pumpkin cookie. These were a great start! Chewier than my previous pumpkin cookies and I loved the texture with the oatmeal in them. The pumpkin flavor in these is very subtle and most people couldn't put their finger on what flavor they were eating! And, of course, you can put any type of chip you would like in them. I personally love the combination of pumpkin and butterscotch, so that is what I usually stick with!


Oatmeal Pumpkin Cookies
Tasty Kitchen

2 cups flour
1 cup quick cooking or old-fashioned oats, uncookied
1 teaspoon baking soda
1/2 teaspoon salt
1 cup butter, softened
1 cup packed brown sugar
1 cup granulated sugar
1 whole egg, slightly beaten
1 teaspoon vanilla extract
3/4 cup pumpkin puree
1 cup butterscotch chips

Preheat oven to 350 degrees F. Combine oats, flour, baking soda and salt. Cream butter; gradually add sugars, beating until light and fluffy. Add egg and vanilla; mix well. Alternate additions of dry ingredients and pumpkin, mixing well after each addition. Stir in butterscotch chips.

Drop a heaping tablepoon of dough onto a lightly greased baking sheet. Bake 13-15 minutes, until cookies are firm and lightly browned.

Wednesday, August 25, 2010

S'mores Whoopie Pies


I read an article awhile back (I can't even remember where it was from) that said whoopie pies are going to be the new cupcake. The argument is that everything people love about cupcakes (its portability and blend of cake and frosting to name a few), holds true for whoopie pies as well! And I LOVE me a good whoopie pie!

These are much more elegant than your average frosting sandwhiched between two cakey-cookies whoopie pie. It is made with a specialty pan that my dorky self picked up at Williams Sonoma. The "cookies" are made with a chocolate cake recipe, which would make it very difficult to do this without the specialty pan, although I'm sure you could use any cookie recipe and get great results!


I got to play around with our kitchen torch to brown the marshmallow filling, which always makes for a fun time in the kitchen. And when it is put together, the cake is topped with chocolate ganache and crumbled graham crackers.

This is definitely a whoopie pie that you will need a plate to eat, but you will certainly not be sorry! YUM!


S'mores Whoopie Pies
From My Baking Addiction

1 cup white sugar
3/4 cup and 2 tablespoons all-purpose flour
1/4 cup and 2 tablespoons unsweetened cocoa powder
3/4 teaspoon baking powder
3/4 teaspoon baking soda
1/2 teaspoon salt
1 egg
1/2 cup milk
1/4 cup vegetable oil
1 teaspoon vanilla extract
1/2 cup boiling water

4 egg whites
1 cup of sugar
¼ teaspoon of cream of tartar
1 teaspoon vanilla extract

5 ounces of semisweet chocolate
½ cup heavy cream

graham cracker crumbs for garnish

For the cake:

Heat oven to 320 F. Spray your whoopee pie pan with non-stick cooking spray.

Stir together sugar, flour, cocoa, baking powder, baking soda and salt in large bowl. Add egg, milk, oil and vanilla; beat on medium speed of mixer 2 minutes. Stir in boiling water (batter will be thin). Pour 1 ½ tablespoons of batter into each well of the whoopie pie pan.

Bake 8-10 minutes or until wooden pick inserted in the center comes out clean. Cool for 10 minutes in the pan then invert the pan and allow the whoopies to cool completely on wire racks.

Wash and dry the pan and re-spray with non-stick cooking spray and repeat with the remaining batter. You will end up with 36 whoopie cakes that once sandwiched will yield 18 whoopie pies.

Once your whoopies are cool, prepare the marshmallow frosting.

For the frosting:

Place egg whites, sugar, and cream of tartar in the heatproof bowl of an electric mixer. Set over a saucepan with simmering water. Whisk constantly until sugar is dissolved and whites are warm to the touch, 3 to 4 minutes.

Transfer bowl to electric mixer fitted with the whisk attachment, and beat, starting on low speed, gradually increasing to high, until stiff, glossy peaks form, 5 to 7 minutes. Add vanilla, and mix until combined.

For the topping:

Place the chocolate into a medium bowl. Heat the cream in a small sauce pan over medium heat. Bring just to a boil, watching very carefully because if it boils for a few seconds, it will boil out of the pot. When the cream has come to a boil, pour over the chopped chocolate, and allow to sit for a few minutes. Whisk until smooth.

Assembly:

Pipe filling on the flat sides of half the cakes (18 of them).

Use a kitchen torch to lightly toast the marshmallow frosting. Top each with one of the remaining cakes; flat side down.

Place a spoonful of ganache on top of each whoopee pie and spread in a circular pattern; garnish with graham cracker crumbs and allow the ganache to set up.

Tuesday, August 17, 2010

Cupcake Pebble Treats


So I've got an issue with sugary cereals. Actually, the issue is all mine because if I buy sugary cereal I just end up eating all of it straight out of the box in one sitting.

That's why, when I discovered Cupcake Pebbles at the grocery store, I knew I would have to make something with them. And what's better on a hot day than giving the oven a rest and making a form of Rice Krispies Treats?

These were just simply awesome. The Cupcake Pebbles are just as delicious as the Cocoa Pebbles and make a wonderful marshmallow treat!


Cupcake Pebbles Treats

1/4 cup butter
1 10.5-oz. package marshmallows
1 11-oz. package Cupcake Pebbles Cereal

Melt butter in a medium saucepan over medium heat. Add marshmallows and stir until they are melted. Remove from heat and add cereal.

Press mixture into a 9 by 9 inch pan coated with cooking spray. Allow to cool completely before cutting into squares.

Thursday, August 12, 2010

Cupcakes are soooo last year...

That is all I have been hearing, cupcakes are over, ca-put, finished, washed up. I took this news as any food enthusiast would, I sat in my room and cried while shoving delicious Crumbs cupcakes into my mouth, and we are not talking the mini ones my friends. For months I have been refusing to acknowledge the new trend, macarons. They seemed too little and airy to be delicious and dessert worthy. But after reading countless recipes and seeing them EVERYWHERE I figured I owed it to you and to my belly to see what all the fuss is about.

I must admit after doing a little macaron research I was a little intimidated. Almost every post I read about the little guys said I had no hope of getting them right on the first try. There were so many rules to follow exactly or my little puffs wouldn't get the feet they need to be considered true macarons.  I found a recipe that seemed relatively easy and followed it exactly as Annie's Eats said.  The only change I made was to make sure that the egg whites were aged for 48 hours before using.


And look at these babies! After baking and tasting the final product, I have to admit cupcakes are so last year...

Chocolate Macarons with Espresso Ganache Filling

from: Annie's Eats


Ingredients:
For the macarons:
110 gm blanched slivered almonds
200 gm minus 2 tbsp. confectioners’ sugar
2 tbsp. cocoa powder (Dutch-process preferred)
100 gm egg whites (from about 3 eggs), aged at room temperature for 12-24 hours
50 gm granulated sugar

For the espresso ganache:
½ cup heavy cream
1 tbsp. unsalted butter
1 tbsp. granulated sugar
4 tbsp. bittersweet chocolate
1½ tsp. espresso powder

Directions:

Pulse the almonds in the bowl of a food processor until finely ground. This takes longer than you would think. You want to make sure the almonds and the confectioner's sugar blend well. Add the confectioners’ sugar and cocoa powder to the bowl and process until blended. In the bowl of a stand mixer fitted with the whisk attachment, whip the egg whites on medium-high speed until foamy.

Gradually add the granulated sugar and continue beating until a smooth, shiny meringue with stiff peaks forms.
Add the almond mixture to the bowl with the meringue and  gently fold together until no streaks remain.  The batter will be on the thick side, but it should still flow off the end of the spatula.

Line two baking sheets with silicone baking mats or greased parchment paper.  Transfer the batter to a piping bag fitted with a plain wide round tip.  Pipe into  rounds on the prepared baking sheets, you can make these guys any size you want I made some big ones and some babies just make sure you have a match for each cookie.  Let sit at room temperature for about an hour to develop a shell.

Preheat the oven to 300˚F.  Bake for 8-10 minutes, depending on size.  Transfer the pans to a wire cooling rack and let cool completely before moving the cookies. It took my cookies about an hour before I was able to move them.

While the cookies are cooling, make the ganache.  Combine the cream, butter and sugar in a small saucepan over medium-high heat.   Bring the cream mixture to a simmer, remove from the heat and add chocolate.  Let stand 2 minutes, then whisk gently until the ganache forms.  Blend in the espresso powder.  Stick the bowl to the freezer or refrigerator and let cool, stirring every 10 minutes until thickened.

Once the cookies are totally cooled, match them up by size.  Pipe a layer of ganache onto the flat side of one cookie of each pair.  Sandwich together with the remaining cookie, pushing the filling to the edges.  Store in an airtight container in the fridge if they last that long!